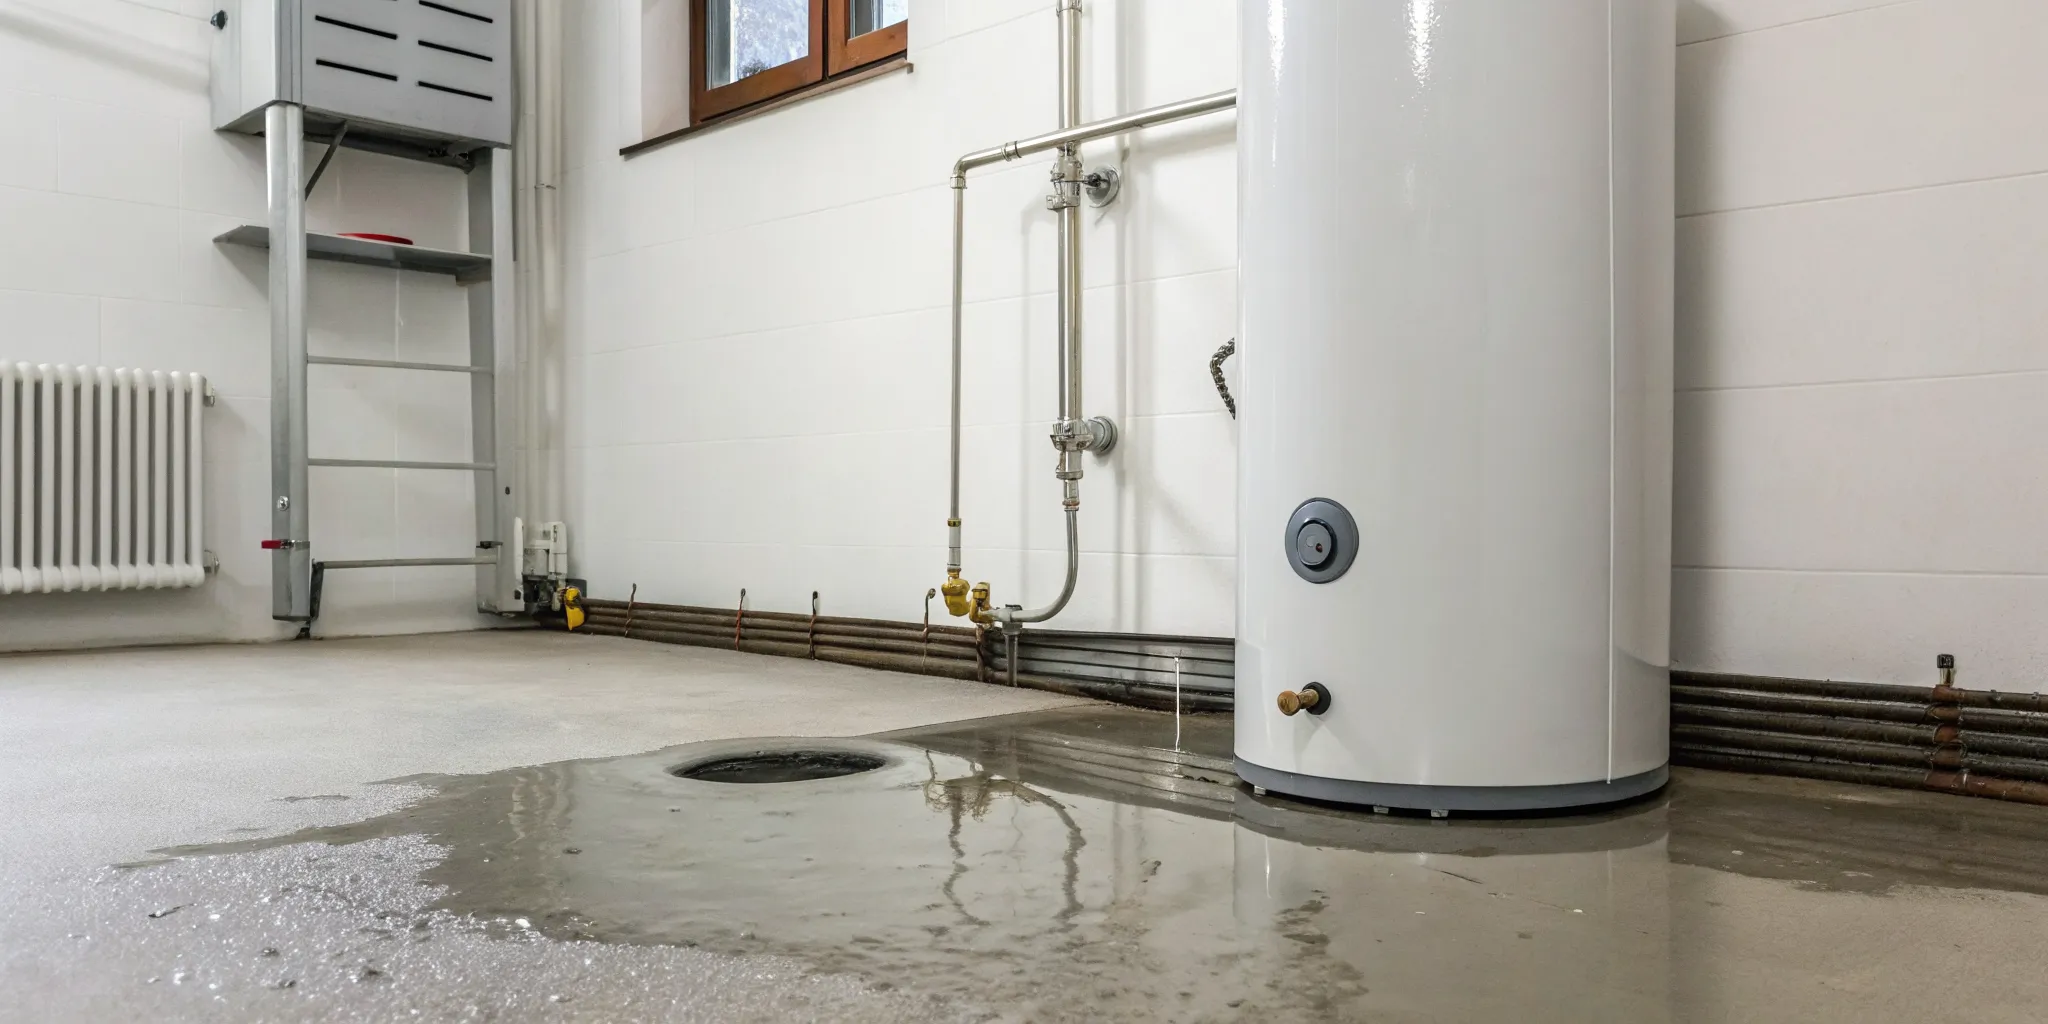
That puddle under your water heater isn't just an annoyance—it's a direct hit to your wallet. When you have an electric water heater leaking from the bottom, it's not just water you're losing. Your unit is forced to work overtime, constantly heating new water to replace what’s escaped. This wasted energy shows up as a frustrating spike in your utility bills. And that's before we even talk about potential water damage or the cost of a major repair. Let's pinpoint the source of the water heater leak now, before a small drip becomes a big expense.
Key Takeaways
- Pinpoint the Leak's Origin: Before assuming the worst, turn off the power and investigate the source. A puddle on the floor could come from a simple fix like a loose pipe connection at the top, not necessarily a failed tank.
- Prioritize Safety and Damage Control: Your first moves are critical. Immediately shut off the power at the circuit breaker and the main water supply to your home to prevent further damage and create a safe environment for inspection.
- Embrace Proactive Maintenance: You can prevent most leaks with a simple routine. Flushing the tank annually to clear sediment and scheduling professional inspections will extend your water heater's life and protect your home from future problems.
Why Is My Electric Water Heater Leaking from the Bottom?
Finding a puddle of water under your electric water heater is never a welcome sight. Your mind might jump to the worst-case scenario, picturing a flooded basement and a huge replacement bill. While a leak can certainly be serious, it doesn't always mean your water heater is doomed. Sometimes, the fix is surprisingly simple. The key is to figure out where the water is coming from. A leak that appears at the bottom of the unit could be from a loose valve, a failing safety component, or a problem with the tank itself. Before you panic, let's walk through the most common culprits. Understanding what causes these leaks can help you identify the problem and decide on the best next step, whether it's a quick DIY adjustment or calling in a professional for plumbing services.
Other Warning Signs of a Failing Water Heater
A puddle on the floor is an obvious cry for help, but your water heater can send more subtle signals that it's in trouble. Paying attention to changes in your water's temperature, color, or how often your unit needs repairs can save you from the headache of a full-blown emergency. If you notice any of these issues, it’s a good idea to investigate further. These symptoms often point to an aging system that’s becoming less efficient and more likely to fail completely. Catching them early gives you time to plan for a repair or replacement on your own terms, rather than in a panic.
Lukewarm or Inconsistent Hot Water
Is your morning shower more of a lukewarm letdown than a hot, relaxing start to your day? If you find yourself waiting forever for the water to heat up, or if it runs out much faster than it used to, your water heater is likely struggling. This inconsistency is often a sign that a key component, like the heating element, is on its last legs. It could also mean there's significant sediment buildup inside the tank, which forces the unit to work harder to heat the same amount of water. While you might be tempted to just live with it, this inefficiency will show up on your energy bills. It’s best to have a professional diagnose the problem with expert plumbing services before you’re left with no hot water at all.
Discolored or Rusty Water
If you turn on the hot water tap and see a brownish, rusty, or muddy stream, take it seriously. This isn't just an aesthetic issue; it's a major red flag that the inside of your water heater tank is corroding. That metallic taste or the sandy particles you might notice are bits of the tank itself breaking down. Once rust takes hold, it's only a matter of time before it eats through the steel and causes a significant leak. There's no simple fix for internal corrosion—the tank's integrity is compromised. This is a clear signal that your water heater is nearing the end of its life, and you should get in touch with an expert to discuss a replacement before you face catastrophic water damage.
Frequent Need for Repairs
Are you and your plumbing technician on a first-name basis because of your water heater? While a single repair is one thing, needing to call for service multiple times a year is a sign that you're throwing good money after bad. The costs of frequent fixes for an aging unit can quickly add up, often approaching the price of a brand-new, more efficient model. Think of it as an investment: continuing to patch up an old, failing system is a short-term solution that will likely lead to more breakdowns and higher energy bills. Regular professional check-ups, like those included in our membership program, can help you stay ahead of issues and get an honest assessment of when it's time to plan for a replacement.
Is a Faulty Drain Valve to Blame?
At the bottom of your water heater tank, you'll find a small spigot: the drain valve. Its job is to let you empty the tank for maintenance or repairs. If this valve is the source of your leak, you might be in luck. Sometimes, the handle gets bumped and isn't fully closed, allowing a slow drip to escape. The fix could be as simple as tightening it by hand. However, the valve itself can also wear out or break over time, especially if it's made of plastic. If tightening the handle doesn't stop the leak, the valve will likely need to be replaced. This is a relatively minor repair, but it's important to address it before a small drip becomes a bigger problem.
Could a Failing T&P Valve Be the Problem?
Every water heater has a Temperature and Pressure (T&P) relief valve. This is a critical safety device designed to automatically release water if the temperature or pressure inside the tank gets dangerously high. You'll see it on the side or top of your heater with a pipe running down towards the floor. If you notice water dripping from the end of this pipe, it means the valve is doing its job or it's failing. While it's designed to protect your home from a potential explosion, a constantly leaking T&P valve needs immediate attention from a professional. Don't try to fix or cap this yourself; it's a job for an expert to ensure your system remains safe.
Is It Corrosion or Sediment Buildup?
This is the cause every homeowner dreads. If the leak is coming directly from the tank itself, it usually means the inner lining has corroded and failed. Over the years, minerals and sediment from the water supply settle at the bottom of the tank. This buildup can eat away at the tank's protective lining, eventually causing rust and a leak. Unfortunately, a corroded tank cannot be repaired. This kind of leak is a clear sign that you need a full water heater replacement. Regular flushing can help prevent this, which is why we include it in our membership maintenance plan to extend the life of your unit.
Are Your Inlet and Outlet Connections Loose?
Sometimes, a leak that pools at the bottom didn't actually start there. Your water heater has two pipes connected at the top: the cold-water inlet and the hot-water outlet. The connections for these pipes can loosen over time, causing water to drip down the side of the tank and collect on the floor. Before assuming the worst, grab a flashlight and carefully inspect the top of your unit. If you see drips or signs of moisture around these pipes, the fix might just be tightening a connection. If you're not comfortable doing this yourself, or if tightening doesn't solve the problem, it's a quick and easy job for a plumber to handle.
Is High Water Pressure the Culprit?
Think of your home's plumbing like a highway—it's built to handle a certain amount of traffic, or in this case, water pressure. When that pressure gets too high (typically over 80 psi), it puts a huge strain on everything connected to it, especially your water heater. This constant stress can weaken the tank's seals and connections, eventually forcing water out and creating a leak at the bottom. It can also cause your T&P valve to drip as it tries to release the excess pressure, which is a clear warning sign. If you suspect high pressure is the issue, it's not something to ignore. We can easily test your home's pressure and, if necessary, install a pressure-reducing valve. It's a straightforward fix that protects your water heater and entire plumbing system from the stress of high pressure, preventing future leaks and expensive repairs.
How to Find the Source of Your Water Heater Leak
Seeing a puddle under your water heater is alarming, but try not to panic. The first step is to play detective and find exactly where the water is coming from. Because water can travel down the side of the tank, a puddle at the bottom doesn't always mean the leak originates there. It could be coming from a connection at the top and simply collecting at the base. A careful inspection will help you understand the problem so you can take the right next steps. This process is straightforward and will give you a much clearer picture of what you're dealing with.
What You'll Need to Get Started
Before you start your inspection, grab a flashlight and a few dry paper towels. Water heaters are often tucked away in dark closets, garages, or utility rooms, so a good flashlight is essential for getting a clear view of all the components. The paper towels are your best tool for confirming a leak. You can wipe down a suspicious connection or valve completely dry, then check it again after a few minutes. If it’s wet again, you’ve found your culprit. This simple method is surprisingly effective for tracking down even the slowest drips.
Step 1: Safety First—Turn Off the Power
Your safety is the absolute top priority. Before you get close to the water heater or touch any of its parts, you must turn off its power supply. Go to your home’s main electrical panel (or circuit breaker box) and find the breaker labeled for your water heater. Flip it to the "Off" position. This is a critical step to prevent any risk of electric shock while you’re working around water and metal. If you aren't 100% sure which breaker controls the water heater, it's always safest to call a professional for help.
Step 2: Safety for Gas Heaters—Turn Off the Gas Supply
If your water heater runs on natural gas, this step is for you. The most important rule when dealing with gas appliances is simple: if you smell gas—that distinct rotten egg odor—stop what you're doing, leave your home immediately, and call your gas company from a safe distance. Do not touch any light switches or electronics. If you don't smell gas and feel safe proceeding, you'll need to shut off the gas supply before inspecting the leak. Find the gas line that runs to your water heater and locate the control knob on the unit's thermostat, then turn it to the "Off" or "Pilot" position. Next, find the shutoff valve on the gas pipe itself and turn the handle so it's perpendicular to the pipe. If you're ever unsure, it's always best to call for professional plumbing services.
Step 2: Inspect the Drain Valve
Look at the very bottom of your water heater tank. You should see a small spigot that looks similar to an outdoor hose bib; this is the drain valve. Its purpose is to allow you to empty the tank for maintenance or replacement. Over time, the valve can become loose, or the internal washer can degrade, leading to a slow but steady drip. Use a paper towel to wipe the valve and the area directly beneath it until it's completely dry. Then, watch it closely for a few minutes to see if any new moisture appears.
Step 3: Examine the T&P Valve
The Temperature and Pressure (T&P) relief valve is a vital safety feature, usually found on the top or side of the tank. It has a discharge pipe that runs down the side of the unit. This valve is designed to automatically release water if the temperature or pressure inside the tank gets dangerously high. If you see water dripping from the end of this pipe, it could mean the valve is faulty or it's doing its job because of an underlying pressure issue. Either way, this situation requires immediate attention from a professional plumber to diagnose the problem safely.
Step 4: Check for Signs of Tank Corrosion
Use your flashlight to carefully inspect the entire surface of the steel tank. Look for any signs of moisture, bubbling paint, or rust streaks. If you find water seeping directly from the body of the tank, it’s a clear sign of internal corrosion. This unfortunately means the tank has failed from the inside out, often due to mineral buildup and a depleted anode rod. A corroded tank cannot be repaired and is a sure sign that the entire water heater needs to be replaced as soon as possible to avoid a major flood.
Step 5: Tighten Any Loose Pipe Connections
Finally, direct your attention to the top of the water heater where the cold water inlet and hot water outlet pipes are connected. A loose fitting at one of these points is a very common source of leaks. Water from a leaky connection here can easily run down the side of the tank and form a puddle at the base, making it seem like the leak is at the bottom. Use a dry paper towel to thoroughly wipe around these fittings and feel for any moisture. A leak here might be a simple fix, but it's important to identify it correctly.
Found a Leak? Here's What to Do First
Discovering a puddle under your water heater is stressful, but taking a few immediate, calm steps can prevent a small problem from turning into a huge mess. Before you even think about what’s causing the leak, your first priority is safety and damage control. Acting quickly can save you a lot of headaches and protect your home from significant water damage.
Think of it as first aid for your home. We’ll walk through the three essential things you need to do right away to secure the area and get the situation under control.
Cut the Water and Power Supply
First things first, let's make the area safe. Head to your circuit breaker and switch off the power to your electric water heater. This is a critical step to eliminate the risk of electric shock. Once the power is off, find your home's main water shut-off valve and turn it completely off. This stops any more water from entering the tank and feeding the leak. Taking these two simple actions immediately contains the problem and ensures you can safely assess the situation without worrying about electrical hazards or a growing puddle. This is a fundamental part of handling any home plumbing services emergency.
How to Contain the Water Damage
Now that the water and power are off, it’s time to drain the tank to prevent further leakage. Find the drain valve near the bottom of the water heater and attach a standard garden hose to it. Run the other end of the hose to a floor drain or outside, somewhere water can drain away safely. Open the drain valve to let the tank start emptying. To help it drain faster, go to a sink inside your house and turn on a hot water faucet. This allows air to enter the tank, breaking the vacuum and speeding up the draining process. This step minimizes the mess and helps protect your floors from extensive damage.
Take Photos for Your Insurance Claim
While the tank is draining, grab your phone and start documenting the scene. Take clear photos and videos of the leaking water heater, the puddle on the floor, and any water damage to surrounding walls, baseboards, or flooring. Make a few notes about when you first noticed the leak and what you saw. This documentation is incredibly helpful if you need to file a homeowner's insurance claim. It also gives our technicians a better understanding of the situation before we even arrive. Once you have your notes, it's time to contact a professional to diagnose the problem and get it fixed for good.
Why You Shouldn't Ignore a Water Heater Leak
A small puddle under your water heater might seem like a minor annoyance, but it’s often a warning sign of much bigger problems. Ignoring it can lead to a cascade of issues that are expensive, destructive, and even hazardous to your health. It’s more than just a little water; it’s a threat to your home’s integrity and your family’s well-being. Understanding the potential consequences is the first step toward protecting your property and making a smart decision about what to do next. Let's look at the real risks you're facing when your water heater starts to leak.
Structural Damage to Your Home
That slow drip from the bottom of your water heater is a serious threat to your home's foundation. Over time, constant moisture soaks into flooring, subflooring, and drywall, causing materials to warp, swell, and rot. What starts as a small, damp spot can weaken the structural integrity of the room, leading to costly and complex repairs. Since leaks rarely fix themselves and usually get worse, addressing the problem quickly is key. A professional can assess the situation and prevent minor water damage from turning into a major structural headache. Our team is experienced in all types of residential and commercial plumbing issues.
The Unseen Threat of Mold
Where there’s persistent moisture, mold is sure to follow. The dark, damp area around a leaking water heater is the perfect breeding ground for mold and mildew. These fungi can begin to grow in as little as 24 to 48 hours, spreading behind walls and under floors where you can't see them. Mold not only causes an unpleasant, musty odor but can also pose significant health risks, triggering allergies, asthma attacks, and other respiratory problems. Protecting your family’s health means stopping the leak and addressing the moisture source immediately. Improving your home's indoor air quality starts with eliminating these hidden threats.
How a Leak Impacts Your Utility Bills
A leaking water heater is a drain on your wallet in more ways than one. First, you’re paying for water that’s just pooling on your floor. Second, and more significantly, the heater has to work overtime to heat the fresh, cold water that's constantly replacing what has leaked out. This continuous cycle means your unit is using more electricity or gas to do its job, leading to a noticeable spike in your monthly utility bills. If the leak is from the hot water outlet, you're losing water you've already paid to heat. Fixing the leak can help you get your energy costs back under control.
From a Small Drip to a Major Flood
A small leak is often the first sign that your water heater's tank is failing. If the internal corrosion gets bad enough, the tank can rupture completely, releasing 40, 50, or even 80 gallons of water all at once. This sudden flood can cause catastrophic damage to your home, destroying furniture, flooring, personal belongings, and anything else in its path. The cleanup is extensive and expensive. Don't wait for a small problem to become a disaster. If you see a leak, it's time to contact a professional plumber to assess whether a repair is possible or if a replacement is needed to keep your home safe.
The Financial Cost of Waiting
Putting off a water heater repair might feel like you're saving money, but it's a gamble that rarely pays off. That small, persistent leak forces your unit to work around the clock, constantly heating fresh water to replace what's been lost. This extra work shows up directly on your utility bills, costing you money every single month. Meanwhile, the water that escapes can quietly cause expensive structural damage to your floors and walls. The biggest financial risk, however, is a complete tank failure. A sudden rupture can release dozens of gallons of water, leading to a catastrophic flood that ruins flooring, furniture, and cherished belongings. Addressing the leak now means choosing a predictable repair cost over a potential financial disaster. Our team can help you understand your options and protect your home.
Repair or Replace? Making the Right Call
Once you’ve found the source of the leak, you face the big question: should you repair your water heater or replace it entirely? The answer isn't always straightforward. It depends on a few key things, like the age of your unit, the location and severity of the leak, and the cost of the fix. A simple repair might get you back up and running quickly, but sometimes, a replacement is the smarter and safer long-term investment. Making the right choice can save you from future headaches and unexpected costs. If you're unsure, our team can help you assess the situation and provide a clear recommendation based on your specific needs. We offer professional plumbing services to help you make an informed decision.
Should You Repair Your Water Heater?
A repair is often the best route for newer water heaters or minor issues. If your unit is less than eight years old and still under warranty, fixing it is usually the most logical step. Leaks from external parts, like a loose drain valve or a faulty T&P valve, are typically simple and inexpensive to resolve. For example, if the leak is coming from a loose pipe connection or requires a small part like a new gasket, a quick repair is all you need. These fixes don't involve the tank itself and can get your system running safely again without the expense of a full replacement.
Is It Time for a Replacement?
Sometimes, a replacement is not just the best option; it's the only one. If you've discovered that the tank itself is leaking, you will need to replace the entire water heater. A corroded tank cannot be safely repaired, and trying to patch it is just asking for a much bigger flood down the road. You should also consider a replacement if your current unit needs frequent repairs or if the cost of the fix is more than 50% of the price of a new one. Investing in a new, reliable water heater can provide peace of mind and prevent the cycle of costly service calls.
Consider the 10-Year Rule
When you're weighing whether to repair or replace, the 10-year rule is an incredibly helpful guideline. Most standard water heaters are designed to last between 8 and 12 years. As your unit approaches this age, it becomes much more susceptible to problems like weakened seals and internal rust. If your older water heater needs a fix, especially if it's had several repairs in the past, it's often smarter to invest in a replacement. A corroded tank, for instance, cannot be safely repaired and is a clear sign that a new unit is necessary. Plus, if any repair costs more than half the price of a new water heater, replacement is almost always the more economical choice. A new, reliable water heater can prevent the cycle of costly repairs and give you peace of mind.
How to Weigh Cost Against Age
The age of your water heater is a major factor in the repair-or-replace debate. Most electric water heaters have a lifespan of about 8 to 12 years. If your water heater is old, particularly over 10 years, the inside of the tank can rust and crack, causing leaks. When this happens, you usually need a new water heater. A good rule of thumb is the 50% rule: if your unit is more than halfway through its expected lifespan and the repair cost is over 50% of the replacement cost, it’s time for a new one. Pouring money into an aging unit often isn't a wise financial move.
Could an Upgrade Save You Money?
If you do need a replacement, think of it as an opportunity to upgrade. Modern water heaters are significantly more efficient than models from a decade ago. If you're replacing your unit, look into newer energy-saving systems like hybrid heat pump water heaters. They use much less energy and can save you a noticeable amount on your monthly utility bills, especially if your water heater is located in a warm area inside your home. While the upfront cost is higher, the long-term savings can make it a fantastic investment for your home and your wallet.
How to Prevent Future Water Heater Leaks
A leaking water heater is a problem no one wants to deal with, but a little preventative care can go a long way. By incorporating a few simple habits into your home maintenance routine, you can extend the life of your water heater and significantly reduce the risk of a messy, expensive leak. Think of it as a small investment of time that protects your home and your peace of mind.
Install a Drip Pan
One of the easiest and most affordable ways to protect your home from water damage is by placing a drip pan under your water heater. Think of it as cheap insurance for your floors, subfloors, and peace of mind. This simple plastic or metal pan is designed to catch any small drips that might come from a faulty valve or the early stages of tank corrosion. A drip pan gives you an early alert before moisture can soak into your home's structure, turning a minor issue into a major repair. If you're getting a new water heater, adding a drip pan is a must-do, but you can also have one installed under your existing unit. It’s a small, proactive step that demonstrates exactly why you shouldn't ignore a water heater leak and helps you catch problems before they become a disaster.
Perform a Regular Tank Flush
Over time, minerals and debris from the water supply settle at the bottom of your tank, creating a layer of sediment. This buildup can cause the tank to corrode from the inside and force your unit to work harder, driving up your energy bills. To prevent this, you should flush your tank about every six months. This simple task clears out the sediment, helping your water heater run efficiently and last longer. If you're not comfortable doing this yourself, our team can handle it as part of our regular plumbing services.
Check the Anode Rod Annually
Inside your water heater is a component called an anode rod. Think of it as a bodyguard for your tank. This metal rod is designed to attract corrosive elements in the water, essentially sacrificing itself to prevent the tank from rusting. Because it's always working, the anode rod wears down and eventually dissolves. We recommend having it checked once a year. If it’s nearly gone, replacing it is a small fix that can save you from the massive cost of a rusted-out tank. Since this check can be a bit involved, feel free to contact us to have a professional take a look.
Find the Optimal Temperature Setting
It might be tempting to crank up the heat for a super hot shower, but setting your water heater’s temperature too high can cause serious problems. When water gets excessively hot, typically above 140°F, it expands and creates immense pressure inside the tank. This constant strain can weaken the tank's structure and lead to leaks. A setting of 120°F is hot enough for most households, reduces the risk of scalding, and helps you save on energy costs. Adjusting the temperature is a simple way to protect your tank and manage your utility bills, contributing to more energy-saving systems in your home.
Don't Forget the Yearly T&P Valve Test
Your water heater has a critical safety feature called the Temperature and Pressure (T&P) relief valve. Its job is to automatically release water if the conditions inside the tank get dangerously high. To make sure it’s working correctly, you should test it once a year by briefly lifting the lever to let a bit of water out. If it doesn't release water or continues to leak after the test, the valve needs attention. A constantly dripping T&P valve is a clear sign of a problem, so if you notice any issues, it's best to call a professional for our plumbing services right away.
When to Call a Pro for Maintenance
While these DIY checks are great for catching obvious issues, nothing beats a professional inspection. A trained plumber can spot subtle signs of wear and tear that you might miss, from a corroding anode rod to a faulty valve. Scheduling annual professional maintenance is the best way to ensure your water heater runs safely and efficiently for its entire lifespan. It’s a small investment that helps you avoid the stress of a sudden leak. Our membership plan includes regular check-ups to give you peace of mind, knowing your system is in top shape and your home is protected.
Related Articles
- My AC Is Leaking Water
- Broken Furnace: Repair It or Replace It?
- 20 Common Problems Requiring Emergency Furnace Repair and How to Prevent Them
- Plumbing Services Services
- Heating Services
Frequently Asked Questions
How serious is a small leak from my water heater? Any leak, no matter how small, should be taken seriously. It’s a clear warning sign that a component is failing. Ignoring it can lead to water damage, mold growth, and a sudden spike in your utility bills. It's always better to investigate a small drip now than to clean up a major flood later.
Are there any water heater leaks I can fix myself? Some minor leaks are simple fixes. For instance, if the drain valve at the bottom isn't fully closed, you can often tighten it by hand. Similarly, a loose pipe connection at the top might just need a gentle tightening. However, for anything involving safety components like the T&P valve or if you're not completely comfortable, it's always safest to call a professional plumber.
How can I tell if the leak is from the tank itself or just a loose part? The best way to pinpoint the source is to dry the entire unit with a paper towel. First, check the pipe connections on top and the drain and T&P valves. If those areas stay dry but you see water weeping directly from the steel tank itself, often with signs of rust or bubbling paint, then the tank has likely failed from internal corrosion.
How often should I have my water heater professionally inspected? We recommend scheduling a professional maintenance check for your water heater once a year. An annual inspection allows a trained technician to test safety features, check for corrosion, and replace parts like the anode rod before they fail. This regular service is the best way to extend the life of your unit and prevent unexpected, costly emergencies.
I found a leak. What is the absolute first thing I should do? Before you do anything else, focus on safety and stopping the water flow. First, go to your home's electrical panel and turn off the breaker that powers the water heater. Next, locate your main water shut-off valve and turn it completely off. These two steps prevent the risk of electric shock and stop more water from feeding the leak, giving you a safe space to figure out what's next.